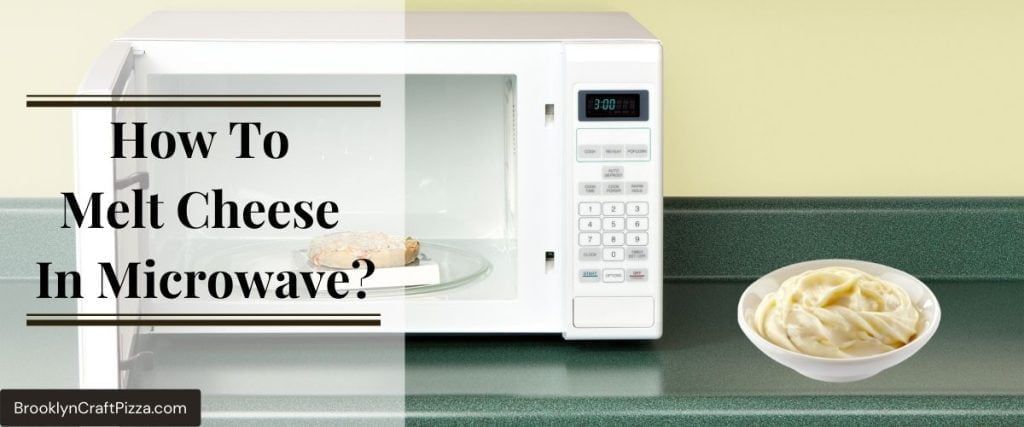
How To Melt Cheese In Microwave Like a Pro!
Do you love melted cheese on your pizza, tacos, and pasta? If you’re like most people, you love cheese. It’s delicious, versatile, and perfect for any occasion. But what do you do when you want to melt cheese but don’t have a stove or oven? Fear not – you can easily melt cheese in the microwave.
If you are looking for a quick and easy way to melt cheese, the microwave is the way to go. In just a few minutes, your cheese will be melted and ready to go. But knowing how to melt cheese in microwave can be tricky.
In this guide, we’ll show you how to melt cheese in microwave properly. So whether you’re making a quick snack or preparing a dish for a party, follow these easy steps and enjoy cheesy goodness in no time!
This guide will walk you through all the steps and methods you need to know in order to achieve perfect, melted cheese every time. Keep reading for tips and tricks on how to melt cheese in microwave evenly, without burning or toughening it up. So get ready to start melting some cheese – let’s go!
How To Melt Cheese In Microwave
Cheese is a versatile ingredient that can be used in many different dishes. To get the most out of your cheese, you need to know how to melt it. It might not be as hard as you think!
You can also learn how to melt cheese in microwave with this handy guide. Get ready for some gooey, delicious melted goodness.
Here are the instruction on How to melt cheese in microwave:
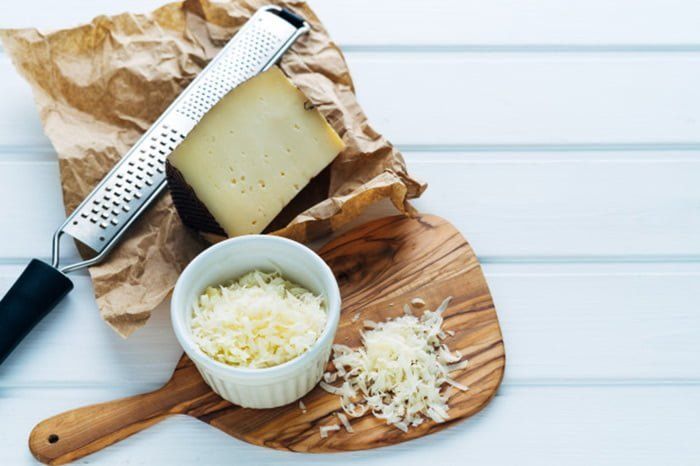
Step 1: Choose Your Cheese
You can melt basically any kind of cheese using the microwave. However, you’ll want to choose a firm, sturdy cheese such as cheddar, swiss, gouda, parmesan and gruyere. You can also use semi-soft cheeses such as Havarti or Colby jack.
Extra Tip:
1) Pre-sliced cheese makes it easier to melt evenly and quickly since the slices are thin and small. But you can still easily melt block cheese like mozzarella or provolone by cutting it into thin slices on your own before placing it in the microwave. Be sure not to cut too thin though, or your cheese will melt too quickly and burn.
2) If you’re in a pinch, you can even use shredded cheese to make this process go faster. Just be careful not to overcook it or it’ll turn into a tough, stringy mess!
Step 2: Cover The Bowl
You can use any kind of microwave-safe bowl for melting cheese in the microwave. Just make sure that the bowl is big enough for the amount of cheese that you are trying to melt.
You want there to be some space between each piece of cheese so that they don’t stick together while being cooked. The best thing to use is a large coffee mug or ramekin – just place a few pieces of cheese inside and you’re ready to begin.
Extra Tip: If you don’t want to dirty up extra dishes, you can even use the container your cheese came in! Just place a few pieces of cheese on top of the plastic and close it tightly with the lid before microwaving.
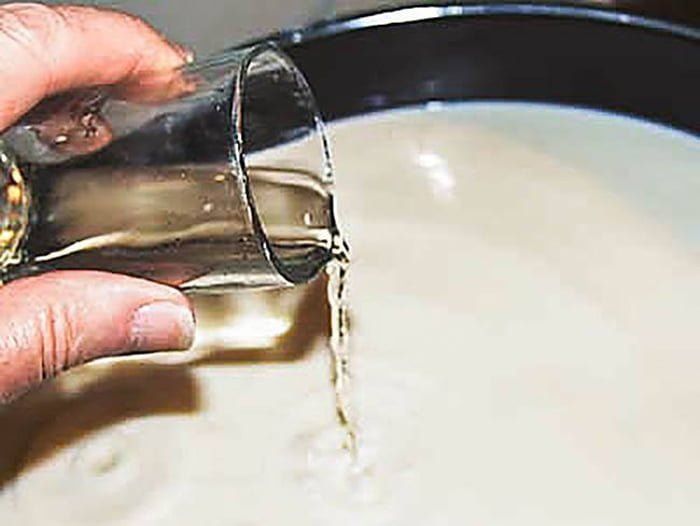
Step 3: Add A Liquid
This step is optional but recommended. Adding a liquid like milk or water will make your cheese melt faster, giving you perfect melted cheese every time!
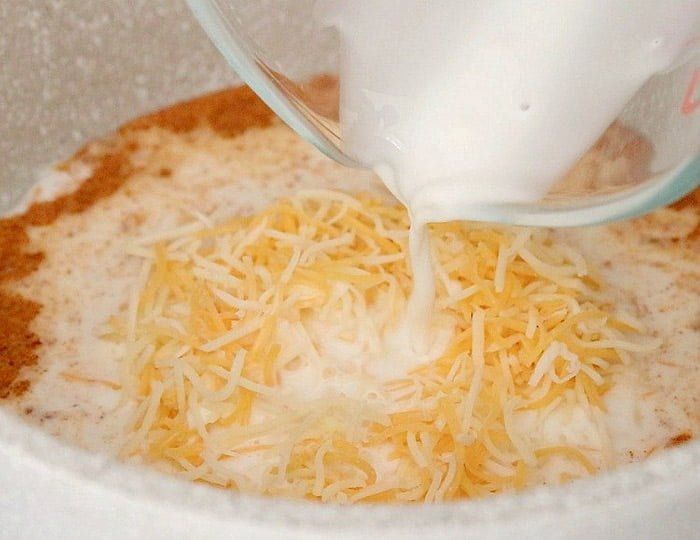
Only add about 1/2 tablespoon at most per serving – remember, this isn’t soup we’re making here! It’s just to help speed up the melting process.
Some people also prefer melted cheese without this step because they find that adding water makes microwaved cheese tougher instead of softer.
Extra Tip: Using evaporated or condensed milk will give your cheese a creamy texture and taste. This is perfect for making mac and cheese, lasagna, and other cheesy dishes!
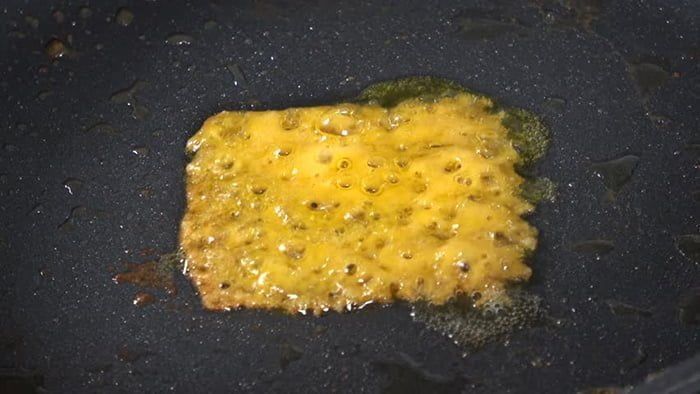
Step 4: Microwave
Now that you’ve covered the bowl with aluminum foil and added some water (or not), it’s time to put it in the microwave. You’ll want to use high power for around 60 seconds – just be sure to stop halfway through and stir things around so that the melted parts don’t harden up while cooking.
Warning: Make sure your bowl can handle being handled while hot! If it cannot, then double-wrap the bowl with aluminum foil before microwaving.
Step 5: Enjoy
Your perfect, melty cheese is ready to eat! You can use it in tons of recipes or just enjoy it on its own with all your favorite crackers.
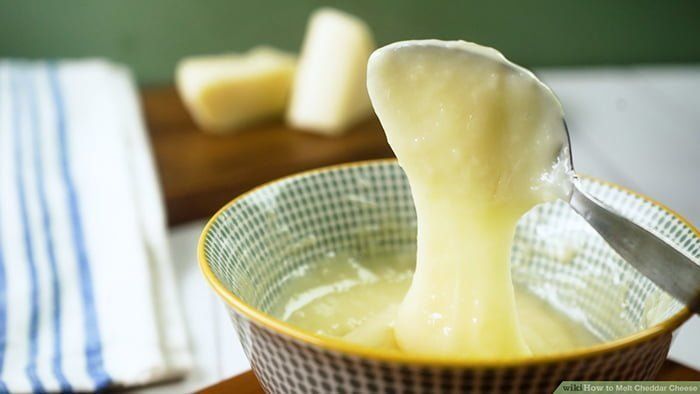
Extra Tip: If you’re planning to melt your cheese for a dish, remember not to overcook it! Doing so will give your cheese a tough consistency that isn’t very tasty.
Follow the steps on How to melt cheese in microwave and your melted cheese should come out perfectly every time! Happy cooking!
Microwaving Different Kinds of Cheese
What type of cheese to microwave?
Now you know how to melt cheese in microwave oven, but can all cheeses be melted this way?
Any cheese will do! Hard, medium and soft cheeses all have their own strengths and weaknesses when it comes to being microwaved so feel free to try different types of cheeses out.
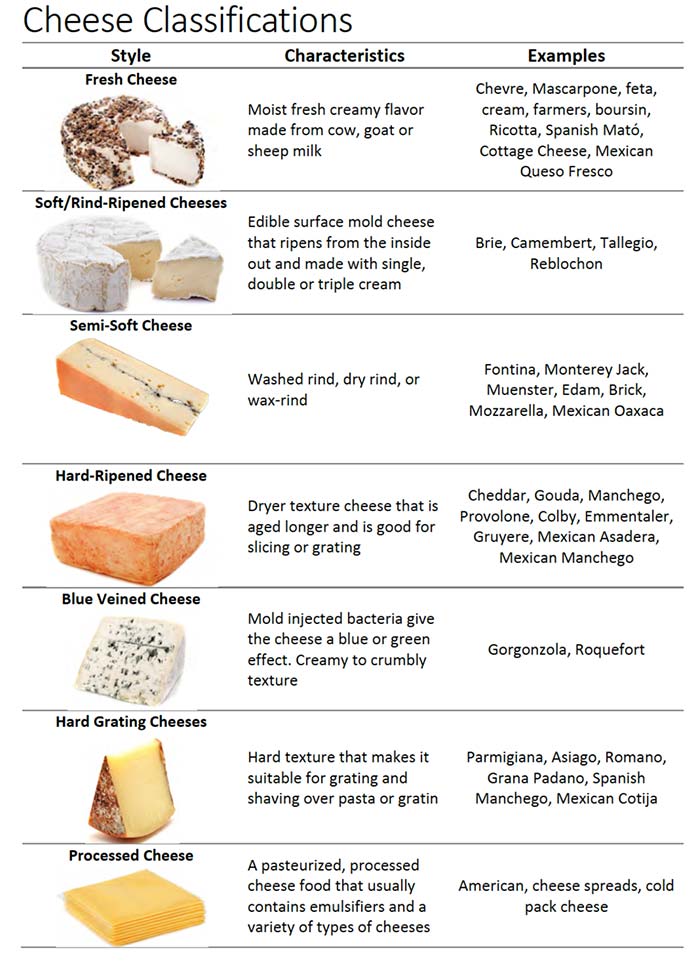
Nearly all types of cheese melt well in the microwave, but some varieties fare better than others.
Generally speaking; soft and semi-soft cheeses such as cottage, cream cheese (1 minute), ricotta (2 minutes) and fresh mozzarella (3 minutes) tend to have a lower melting point so they are easier to work with.
Hard cheeses such as cheddar, gruyere and swiss cheese melt at 150°C – 200°C which makes them a bit more difficult to manage when microwaved.
Semisoft cheeses such as gouda and Monterey jack melts at 160°C – 180°C, whereas most Italian hard cheeses like Parmesan or Asiago require 100°C – 110°C.
Always remember to remove your cheeses from their packaging before microwaving.
Time and Temperature guide to melting different types of cheese
You already know what types of cheese can be melted in the microwave and how to melt cheese in microwave, here are detailed instructions on the melting time and temperature of each different cheese.
Time Guide:
It depends on what kind of cheese you’re planning to use, HERE ARE SOME BASIC RECOMMENDATIONS FOR THE MICROWAVE:
Extra Tip: On average, most kinds of cheese take around two minutes when microwaved in the full power mode. If your microwave has a lower wattage (800 watts), then it will take longer. At the same time, if your microwave has a higher wattage (1000 watts or more), then it will likely be done faster – for example; ninety seconds or less. All microwaves are different though so you’ll need to experiment with yours until you find the perfect timing!
Time and temperature suggestions for melting various types of cheese in the microwave:
• American Cheese – 1 minute and 40 seconds, full power
• Mozzarella – 1 minute and 30 seconds, full power
• Cheddar Cheese – 2 minutes and 15 seconds, full power
• Swiss Cheese – 2 minutes and 30 seconds, full power
• Parmesan Cheese – 1 minute at 50% power than 25 seconds intervals at 70% to 80% power until completely melted. It’s important for the first interval to be at 50% so that the cheese doesn’t stick together but quickly melts without browning. Then you can take your time with it afterward!
• Cream Cheese – 1 minute and 20 seconds, medium or 50% power depending on the wattage of your microwave
• Goat Cheese/Feta/Blue Cheeses – 1 minute and 20 seconds, full power
• Muenster Cheese – 1 minute and 50 seconds, full power
• Cottage/Ricotta Cheese – You can use this as a topping or as an ingredient in other dishes. Experiment with different times to see what gives you the best results!
For example; 30 seconds intervals at 20% to 40% power. Try using 15 seconds first – if it’s not melted enough then try again with another fifteen seconds. The same goes for cheesecake too!
Extra Tip: You can use an oven instead of a microwave or vice versa depending on the type of cheese you are working with. For example, parmesan and ricotta generally melt better in the oven than they do in the microwave, but cheddar tends to fare better in the microwave. The same goes for cream cheese and cottage cheese – both tend to be easier and faster when microwaved.
Happy cooking!
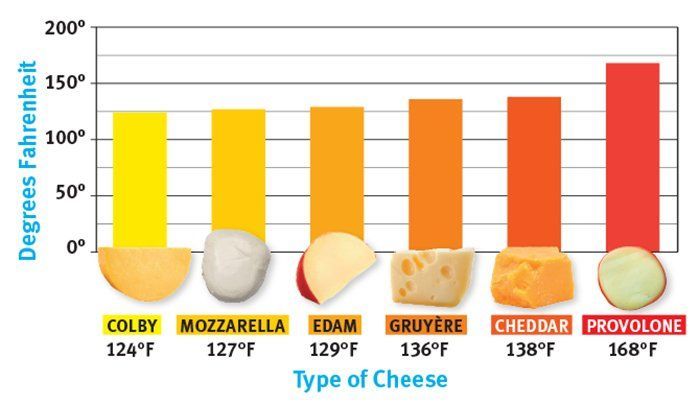
Temperature Guide:
Note: Keep in mind that microwaves vary greatly, so timing is only approximate Temperature (in degrees Celsius or Fahrenheit):
Cheddar, American, Monterey & Pepper Jack – 160°C (320°F) to 180°C (356°F)
Mozzarella – 140°C (284°F) to 150°C (302°F)
Parmesan – 100°C (212°F) to 110°C (230°F)
Swiss Cheese – 100°C (212 ° F) to 110 ° C( 230 ° F )
Extra Tip: If you’re looking for melted cheese perfection every time, then I recommend investing in a small, inexpensive kitchen tool called a culinary torch. It’ll give your grilled cheese sandwiches and mac and cheese casseroles that crispy texture you’ve been dreaming of. If you’re already using the stove to melt cheese in your dishes, then this is a perfect alternative as it frees up space on the stove.
Cheers! Successful melted cheese every time!
Is It Safe To Melt Cheese In The Microwave?
Indeed it is! As long as you follow these simple steps on How to melt cheese in microwave, your delicious cheese should come out perfectly every time. However, as with ANY cooking method, you must exercise caution and common sense.
Feel free to experiment with different quantities of time/power depending on what type of cheese you are working with and the wattage of your microwave. Enjoy!
For example: If you’re microwaving a fresh mozzarella cheese ball or burrata, then two minutes may not be enough to fully melt it without burning the exterior of the cheese first – which means your dish will come out tasting terrible and smelling like burnt plastic (this happened to me once…I was trying to save money by buying on-sale fresh mozzarella at my local market).
Always use your best judgment when melting cheese in the microwave and pay attention if anything seems off. For instance; if your “cheese” is bubbling more than it should, then it’s probably burnt.
To be extra safe, you can also microwave the dish for 30 seconds or so before you actually eat it. If any of the cheese in your cheesy goodness starts to harden up, just zap it in the micro again in 5-10 second intervals until everything is melted and gooey!
A Few Recipes To Try With Melted Cheese:
• Macaroni And Cheese Casserole
• Grilled Cheese Sandwich
• Cheesy Bread For Soup
• Quesadillas/Flautas/Tacos

More Tips: If melting cheese in the microwave doesn’t work out so well for you or if you have a specific recipe that requires crispy cheese without condensation, then try placing a cheese slice/block between two plates or cutting it into cubes and microwaving on full power for 10 seconds at a time until melted.
Tips And Tricks on How To Melt Cheese in Microwave Perfectly
1) It’s best to use smaller quantities of cheese with less exposure time – this is because microwaves tend to generate more heat at the center of the machine, so small pieces will melt quicker without browning or burning. Cheese can also be crispier if it’s cut into cubes before cooking.
2) If you are using larger quantities of cheese by saying, half a wheel or block, then I recommend cutting it into smaller slices or cubes before cooking as this allows each piece to melt evenly with less exposure time overall. This method also prevents your “cheese” from bubbling out onto the edge of your dish which creates an unappealing look and makes clean up much harder (trust me on this one).

3) Cutting cheese into smaller pieces helps prevent burning and browning – which means you won’t have to let it cool down for as long or place a loose cover over your dish.
4) If you’re working with a recipe that calls for melted cheese, then it’s essential to use something like a silicone baking mat or a parchment paper liner so the cheese doesn’t stick!
5) It’s best not to use these methods if cooking something delicate such as cream cheese or soft/fresh cheeses as they tend to be more fragile during microwaving. However, if you plan on experimenting with temperature/time settings, then do so at your own risk. Always pay close attention and watch carefully in case anything goes wrong (better safe than sorry, right?).
6) The best types of cheeses to use are blocks or wedges (rather than pre-sliced). While the latter melts perfectly every time, it’s difficult to judge how thick you want your slices without cutting all of them first.
7) Foods cooked in the microwave tend to retain more moisture – this is great for things like fish and vegetables, but not so good for things like cheese as it will cause it to break down quickly. If consuming melted cheese within a few hours then this isn’t much of an issue though. However, if you’re planning on saving leftover cheese for later, then I recommend reheating just before serving.
8) If melting an extremely thick slice of cheese, then it’s best to first cut it in half horizontally or roast it briefly before microwaving. Just make sure not to roast/broil for too long as this can cause the edges to over brown.
9) For melted shredded cheeses, remember to always sprinkle them lightly on top – do not dump an entire bag into your dish and expect it to cook evenly! This is because the bottom shredded pieces will become overcooked while waiting for the top ones to melt.
10) Reheating cheese in a microwave often causes it to dry out and/or burn at the edges so it’s best to add a few drops of water to it before reheating.
11) When microwaving large blocks of cheese (eg: Gouda, Gruyere), always cut it into smaller pieces to reduce cooking time and improve results. Make sure to cut them all the same size so they cook evenly!

12) If your microwave doesn’t have a rotating dish/turntable then it’s best to occasionally rotate your dish by 90 degrees halfway through the cooking process. This ensures that all sides of the cheese are equally melted instead of being cooked unevenly – which often causes rubbery or tough results!
13) If you’re looking for tender/silky smooth results then I recommend using a high quality melting cheese – this is because lower quality cheeses (eg: American, Velveeta) tend to be very rubbery when melted.
14) If you notice excess moisture forming on the bottom of your dish before it’s finished cooking then there’s a simple solution – place an upside-down plate over the top of your dish and microwave again! This will cause most of the moisture to evaporate which results in tender/more evenly melted cheese.
Do you have any tips or tricks for working with different cheeses? If so, then leave a comment below and share them with us!
Cautions Regarding Safety When Melting Cheese In The Microwave
1) As microwaves tend to be less powerful than regular ovens, then your cheese might not reach certain temperatures that other cooking methods could. If you’re not sure whether or not the cheese has melted enough, then it’s best to err on the side of caution and cook for a bit longer.
2) When using the microwave method, the dish’s contents are transferred directly into your food – with no protective barrier in between. This means that any plastic components will heat up with your cheese which could cause poor melting results or even burn/melt some of your ingredients. Always use tempered glassware when melting cheese in the microwave!
3) Microwaving very hard cheeses can cause them to splatter – this is especially true with Parmesan, which tends to be very dry. To prevent this from happening, coat your dish with a thin layer of liquid (water or oil) before microwaving the cheese.
4) If you need to melt more than one type of cheese in your recipe then I recommend using separate dishes – this is because it’s difficult for cheese flavors to mix together during cooking.
5) It’s best not to exceed 1/2 pound of cheese per person – even if it’s shredded! This is because melting an excessive amount will cause the cheese to bubble up and become very moist as well as potentially sticking to your dish/warranting longer cook times.
6) Avoid browning or burning cheeses on top by keeping them away from the edge of the dish – this is especially important if using a tall/narrow container.
7) It’s best to remove melted cheese from your microwave as soon as it’s done cooking – even if there’s still time left on the timer! This prevents overcooking and reduces excess moisture which can make your cheese turn out a bit lumpy. So, remember to always set a timer for a few minutes less than what you think might be needed – just in case! 🙂
8) If making more than one type of dish requires melted cheese then I recommend preparing them separately so each has its own designated cheese sauce. In doing so, you won’t have to worry about mixing flavors together or risk having too much leftover “liquid gold” at the end of your meal.
9) If you’ve got an “extra cheesy” recipe that calls for two different types of cheeses (ie: Parmesan and Mozzarella), then it’s best to prepare them separately rather than melt both into one mixture. Due to their high-fat contents, Parmesan and other hard Italian cheeses tend to separate easily which can cause significant changes in flavor as well as appearance!
10) Always use fully thawed cheese for this method – frozen slices/blocks will become very brittle and likely break apart when melted! If this happens, then you’ll be left with a watery mess on your hands… yuck! 🙂
How To Use Melted Cheese
Different kinds of cheese melt differently. Here are some tips to help you figure out what kind of cheese will work best for certain dishes:
✅ For melting queso fresco, gouda, or cheddar in nachos or tacos, all you have to do is follow steps 1 and 2 above.
✅ When making macaroni and cheese, avoid using pre-shredded cheese at all costs! The shreds come loose too quickly when melted which can make your dish slimy. Instead, just grate the desired amount of cheese before starting this process – it’ll be much easier on you!
✅ If you’re trying to give your grilled cheese an extra kick of flavor, try combining multiple kinds of cheeses! Combining sharp cheddar and mozzarella not only gives your sandwich a great taste but also melts beautifully every time.
✅ When making casseroles or lasagna, you can get creative with your cheese! Just be sure to grate it first so that you can mix and match cheeses with ease. You might want to try mixing in some ricotta cheese for a creamy texture!
✅ For foods like macaroni and cheese or meatloaf where you need a strong melted cheese topping, consider using a gourmet blend of cheeses from the deli counter! You’ll find all sorts of interesting ones including blue cheese mixed with brie for a tangy flavor punch – perfect when used as a chicken marinade too!
✅ For grilled cheese sandwiches, mix in one or two kinds of cheeses to melt perfectly every time. You can also try adding a bit of cream cheese for an extra “gluey” layer which will prevent the sandwich from falling apart too quickly.

✅ When it comes to homemade macaroni and cheese, you’ll find that making this recipe is much easier when using only one type of melted cheese rather than two. The addition of melted butter helps keep everything creamy even without having both cheddar and mozzarella mixed together! 🙂
✅ If you’re making quesadillas then feel free to use either shredded or sliced cheese – they’ll both work equally well! Just remember to cut your tortilla into smaller pieces so that they fit nicely when making mini quesadillas.
✅ If you’re simply looking to add some cheese flavor to your dish without any actual cheese chunks, then grated Parmesan is the way to go! It melts beautifully and adds a zesty “zing” flavor right off the bat! You can also try adding some spices like Italian seasoning or garlic powder into the mix for more complex flavors.
✅ When it comes time to melt your cheese in dishes like macaroni and cheese or lasagna, opt for using only about half of the required amount of shredded/sliced cheese with this method! The rest will still hold its structure when baked (unlike with other methods) which will help prevent your dish from becoming too dry.

✅ Finally, for grilled cheese sandwiches that simply must have the whole block melted into one gooey layer of cheese perfection, try using American singles! This is definitely melting at its finest 🙂 Don’t forget to add a little bit of butter to your skillet before placing your sandwich down – it’ll help with getting that golden crispy crust on each side!
So there you have it! Now that you know how to melt cheese in microwave, what are you waiting for? Get out there and make yourself some cheesy goodness… 😉
How to Store Melted Cheese
✅ Queso fresco, Gouda or cheddar – room temperature in an airtight container for up to 1 week. Parmesan – at room temperature under constant 70 degrees Fahrenheit (21 Celsius) in an airtight container for up to 6 months.
✅ Macaroni and cheese dishes – covered with plastic wrap directly after cooking and refrigerated within 2 hours.
✅ Cream cheese – wrapped well with cling film to preserve freshness before freezing; frozen cream cheese should be thawed gradually overnight in the refrigerator rather than at room temperature which can cause condensation. If desired, bring to room temp by letting sit out on the counter until soft enough to mix easily without tearing apart.
✅ Mozzarella, brie & ricotta – stored in their original containers in the fridge and used within 5 days.
✅ Feta – stored in brine (its natural juices) and used within 2 weeks; if stored without the liquid, wrapped tightly with cling film and use within 3 days.
✅ Gouda & Gruyere – stored in an airtight container and used within 1 week.
✅ Cheddar & Parmesan – can be stored in their original packaging or airtight containers at room temperature for up to 6 months; some say cheddar can last up to 12 months but it loses its sharpness after about 8 months of aging so may not be ideal for all dishes calling for “aged” cheddar.
Alternate Ways to Melt Cheese
You can use a variety of methods to melt cheese without a microwave if you don’t have a microwave or prefer not to use one. You can try the following:
1) In a pot over low heat – keep stirring until desired consistency is reached. Just be sure your pot doesn’t get too hot as it might burn the cheese!
2) Double boiler/Bain marie – fill a pot with water and bring to gentle simmer, then place another metal or glass bowl filled with shredded/sliced cheese over the top of the pot so that warm steam can reach it. This method works great if you’re looking to melt larger quantities without having to watch over it!
3) On the stovetop using a double boiler/bain-marie method (see above). This method works great for larger quantities that require longer melting times without having to watch over them 🙂
4) In the oven under high heat, just be sure to preheat first so your dish isn’t cold by the time your cheese has fully melted. Also, make sure you’ve covered it with some aluminum foil so you don’t have to scrub burnt cheese off your baking dish afterward!
5) In a fondue pot or chafing dish – just be sure to constantly stir as you’re melting it so you don’t end up with clumps of cheese.
6) Using a crockpot – Just layer the shredded/sliced cheese between wax paper and place in a crockpot on low for around 30 minutes, until melted. If the temperature is too high after this time, turn the crockpot off and remove it from the base to continue melting at room temperature until desired consistency is reached.
7) Oven broiler – Place slices of cheese on an oven-safe plate or baking sheet, then place under high heat for 1-2 minutes until the desired softness is reached. Be sure to pay close attention while using this method as it’s pretty easy to burn your cheese!
❤️ More ways to use cheese:
– Grilled Cheese: The classic grilled cheese sandwich is a simple and satisfying meal that showcases American cheese at its finest. Make sure you butter both sides of the bread!
– Cheesy Bread: This wonderfully simple recipe uses only 4 ingredients to create cheesy pull-apart bread with soft centers and crisp edges.
– Quesadillas: A tortilla folded over & filled with cheese, veggies, meat & seasonings – these are great for making snacks or even small meals on the go 🙂
– Cheesy Fries: Nothing beats the taste of crispy cheesy fries that are hot and ready to eat! They’re great for sharing & snacking on 🙂
– Macaroni & Cheese: An American favorite – nothing satisfies like a bowl of hot macaroni and cheese when the mood strikes.
– Cheese Bites: You can never go wrong with bite-size snacks to set out when you have company over – these baked potatoes filled with cheese, scallions and bacon will delight everyone who tries them!
FAQs on How To Melt Cheese In Microwave
Is it safe to eat microwaved cheese?
Cheese is generally safe to eat if heated at the correct temperature and for the correct amount of time however there are some risks involved. Microwaves heat their contents by causing water molecules present in food to vibrate, building up energy within the food which causes its temperature to rise. If this heated food is not consumed immediately, the extra heat energy will continue to cook the inside of the food leading to a less than ideal eating experience as well as possibly causing certain harmful bacteria present in the cheese to multiply more quickly increasing your chances of getting sick!
What is the best way to melt cheese?
We would recommend the microwave (for convenience), double boiler (great for larger quantities that require longer melting times without having to watch over it) or oven broiler method if you’re looking to melt a larger quantity. For smaller quantities, just use a pot on your stovetop and stir constantly until fully melted or store in the freezer until ready to use!
What kind of cheese is best for melting?
Any kind of cheese can be used in most recipes calling for melted cheese however harder cheeses such as Parmesan will produce far better results than softer cheeses such as mozzarella.
Is it okay to store shredded/sliced cheese in its own bag in the fridge?
It’s not ideal to keep shredded or sliced cheese in its own bag for extended periods of time – it can dry out and absorb other flavors. Instead, store your shredded or sliced cheese in an air-tight container (preferably one without a lid that is easily opened) on the bottom shelf of your fridge.
Just make sure there’s no air in the bag and be sure to use it within a few days for best results!
How long can cheese be stored in the fridge?
Properly stored, shredded/sliced cheese should last around 1-2 weeks in optimal condition. It’s always best not to eat any cheese while it’s still frozen as this will cause it to go bad much more quickly! If you feel your cheese has gone bad, try smelling it. If there is no smell – its okay to eat 🙂
How do you melt cheese in the microwave without burning it?
First, it is very important to use a microwave-safe dish when microwaving your cheese. Also, microwave at 30 seconds intervals and stir between each heating period. The cheese will always keep melted so if you aren’t happy with the consistency before all of it has been heated, just empty the cheese/liquid into a pot or bowl and continue heating until the desired consistency is reached.
How long can cheese be left at room temperature?
Cheddar and Mozzarella will only last around 1 hour (tops!) at room temperature before starting to go bad however other cheeses such as Parmesan or Gruyere can last up to 2-3 hours in optimal conditions. Always refrigerate any cheese that’s left at room temperature for longer than an hour to ensure it stays fresh and ready to use whenever you need it!
Why is your cheddar cheese not melting?
If your cheddar cheese is not melting, it may be overcooked. Cheddar has a low melting point and does not turn gooey when heated. If you are heating this kind of cheese too long or at too high of a temperature, the water will separate from the protein leaving an oily, unappealing mess!
Conclusion
Cheese is a versatile, delicious ingredient that can be used in many recipes. Melting cheese is an art form. It can be a little tricky to do it perfectly every time, but with these tips, you’ll be able to make delicious and melted cheese dishes without any fuss. Give them a try the next time you’re in the kitchen!
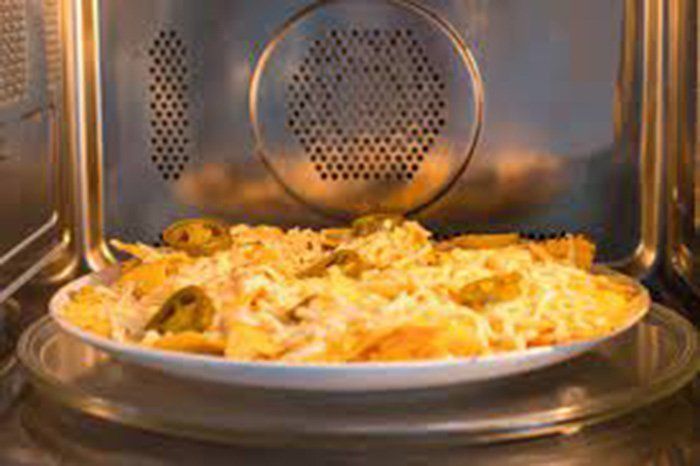
Microwaving cheese is a great way to melt it without having the risks of burning or over cooking. The best part about microwaving cheese is that you can get creative with your choice of cheeses and toppings, which will allow for an even more exciting eating experience! But how to melt cheese in microwave like a pro?
You should start by placing shredded pieces of cheese onto a plate so they are evenly distributed. Once this has been done, place the plate into the microwave and set it on high power for 30 seconds at a time until all of the desired amounts of melting has occurred. For those who want their melted cheese to be extra gooey, try adding oil while heating up your favorite variety in the microwave- we promise there won’t be any complaints once the cheese is on the table!
Melted cheese makes nearly everything taste better. Keep your favorite variety of cheese fully melted with these simple steps! In this article, we have compiled a list of items you will need to successfully melt your cheese. With these guide on how to melt cheese in microwave and tips in mind, you should be able to make a perfect gooey cheese dish in the microwave any time.
We hope this blog post has helped you get the cheese melting process down pat. If not, please reach out to us and we’ll be happy to provide more specific instructions or answer any questions on how to melt cheese in microwave! Let us know how it goes in the comments below. Happy cooking!
Further reading
Top 9 Best Retro Microwave In 2022
How To Defrost Sausage In Microwave Properly?
How To Cook Pasta In The Microwave?


